
Archive Learners
To remove learners from LMS+, you can archive them. When a learner is archived, they no longer have access to LMS+ from the time of archiving and are removed from all assigned training cycles.
Archiving learners is intended to permanently remove learners from LMS+. If you only want to update the master data of learners, please refer to the chapter Updating learners.
It is recommended to only archive learners in LMS+ if the assignment of trainings for the learner is no longer required.
After archiving, you will find the learner under the Archived tab. If you wish to restore a learner, please refer to the chapter Unarchive learners.
Note: Restoring does not restore any previous assignments to training cycles. Reactivated learners must be reassigned to the training cycles.
You can archive individual learners or multiple learners at once.
Archiving individual learners
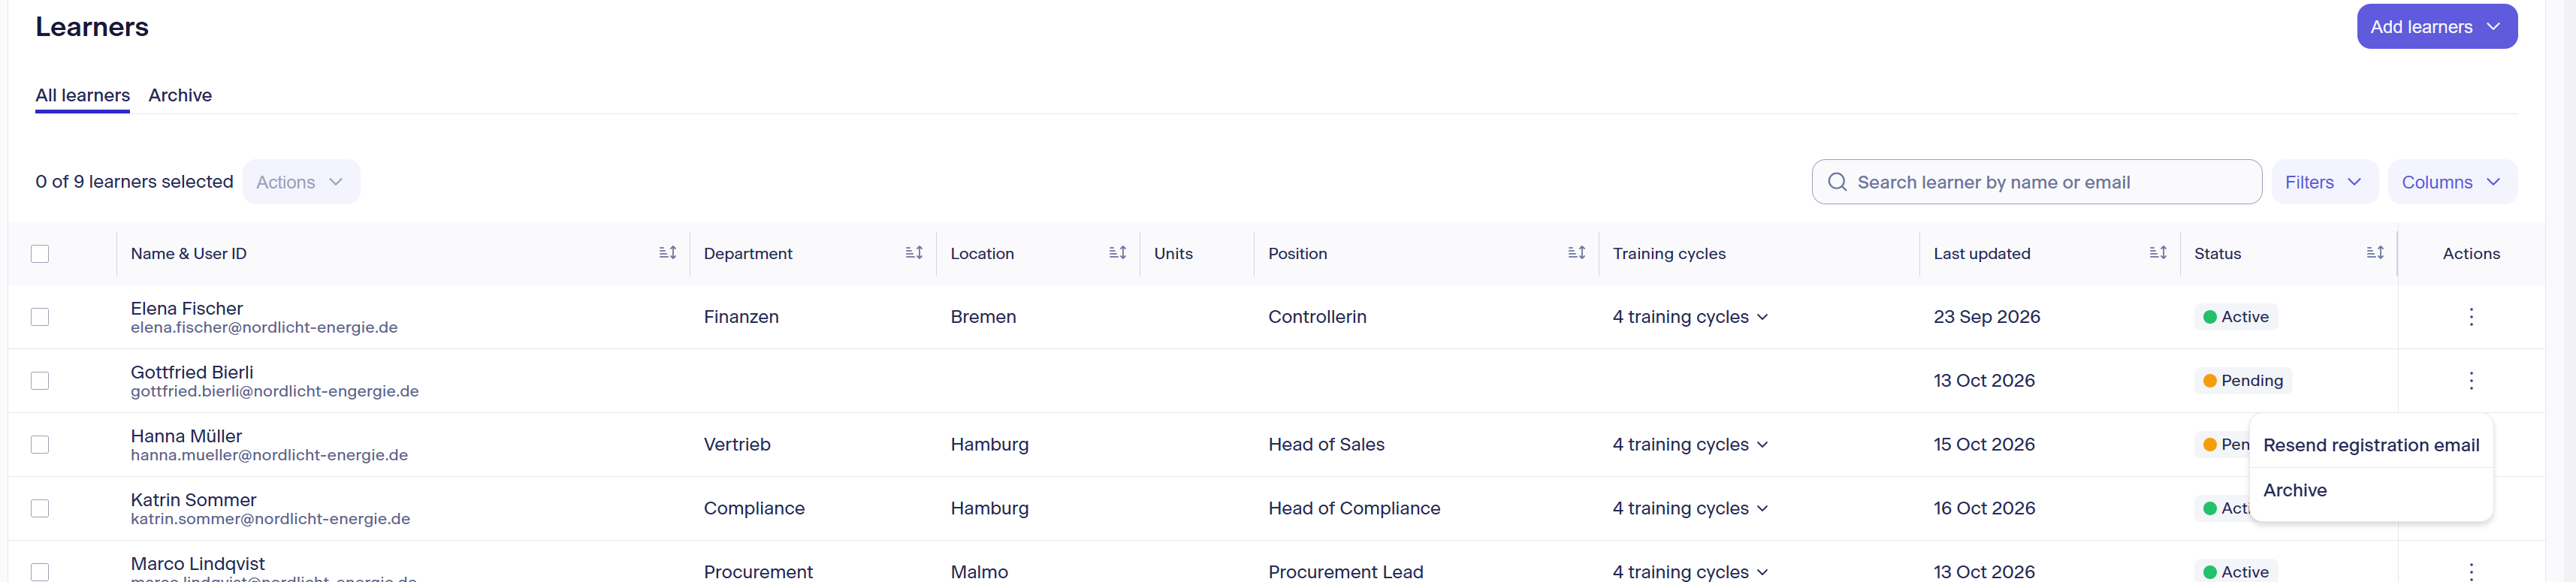
Search for the desired learner in the list of learners and click the three-dots Actions menu on the right side next to the learner. Select Archive from the dropdown menu.
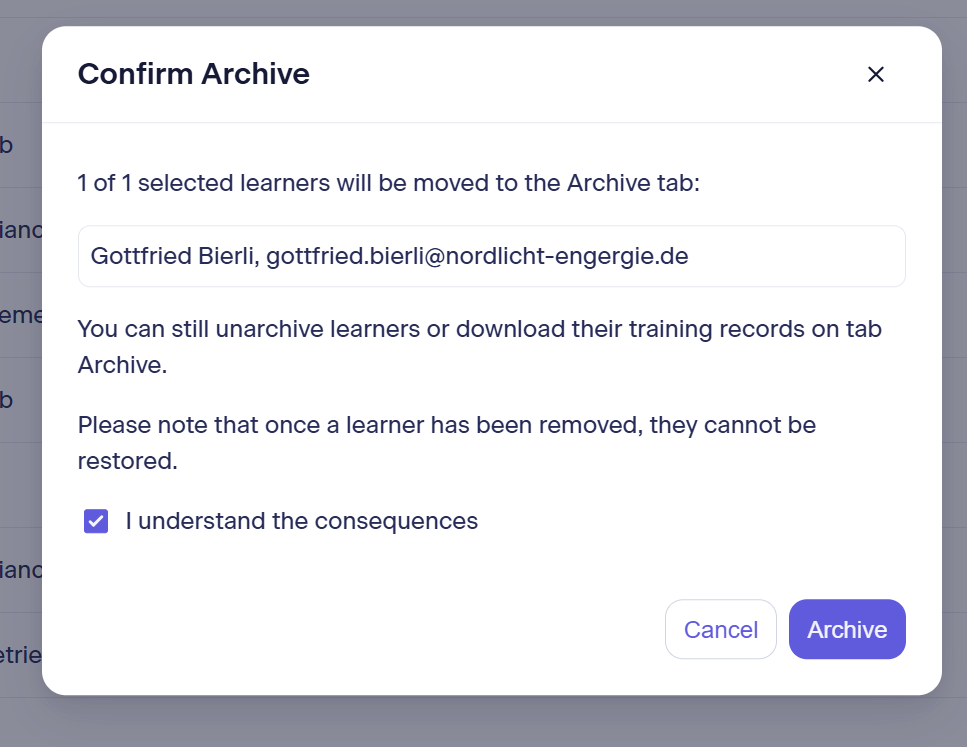
Please note the additional information under Confirm Archive and check the learner to be archived in particular. Click the checkbox to activate the Archive button.
Note: "once a learner has been removed" refers here to permanently deleted learners - archived learners can be reactivated at any time!
After the learner has been archived, they will be removed from the All learners list and you will find the learner under the Archive tab again.
Archiving multiple learners
Search for and select all desired learners in the list of learners by clicking the respective checkbox on the left side. Sorting and filtering functions are available to help you make your selection.
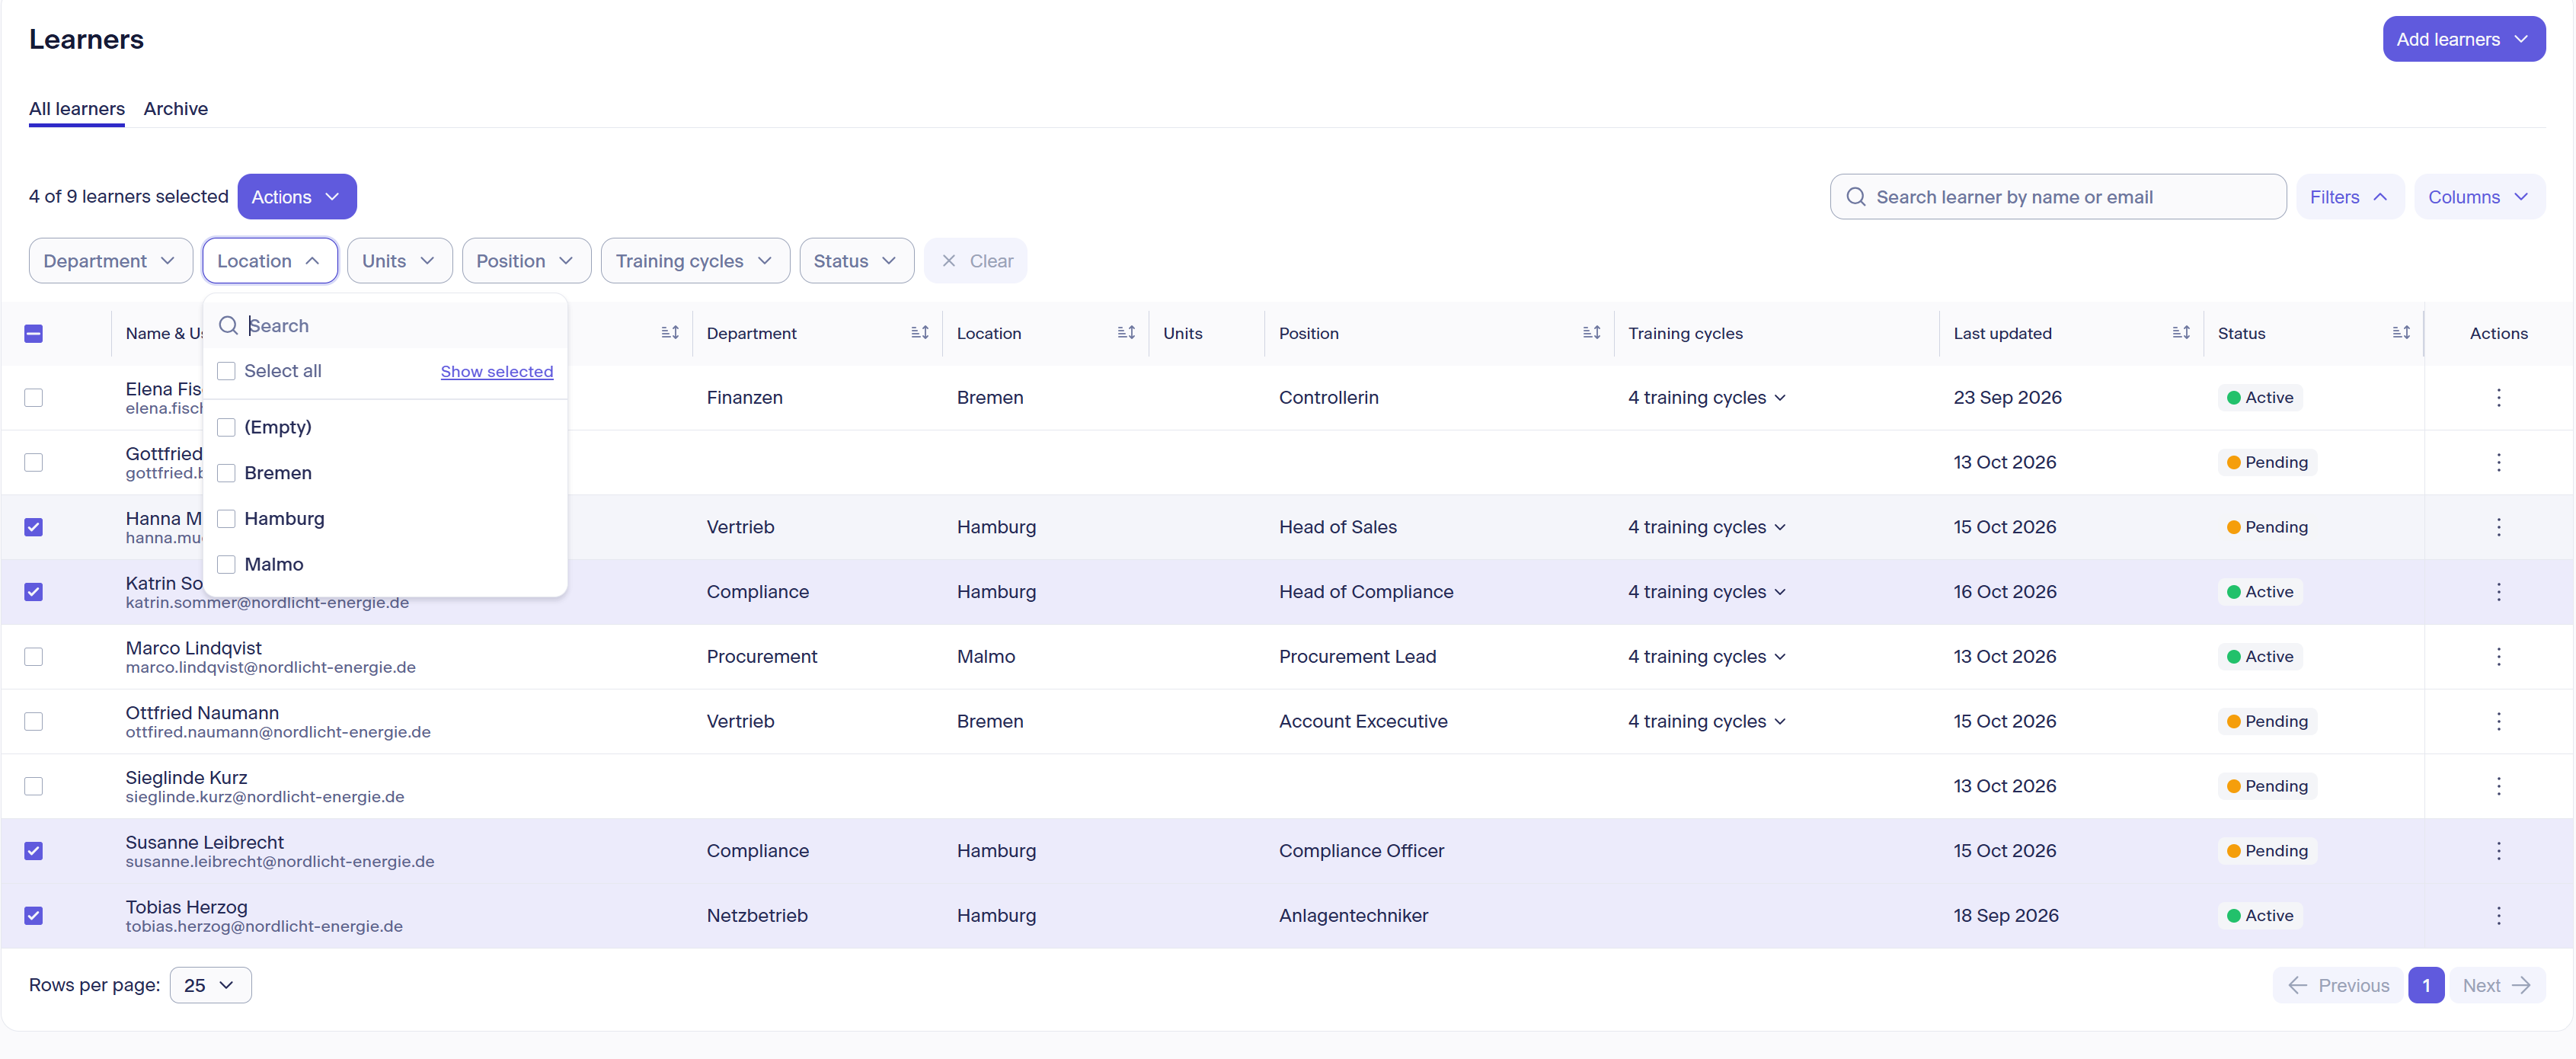
Selected learners will be highlighted in color, and you will also find the total number of selected entries above the list of learners. Choosing additional learners adds them to this selection as you mark further entries. Changing to another list view will not remove the already selected learners.
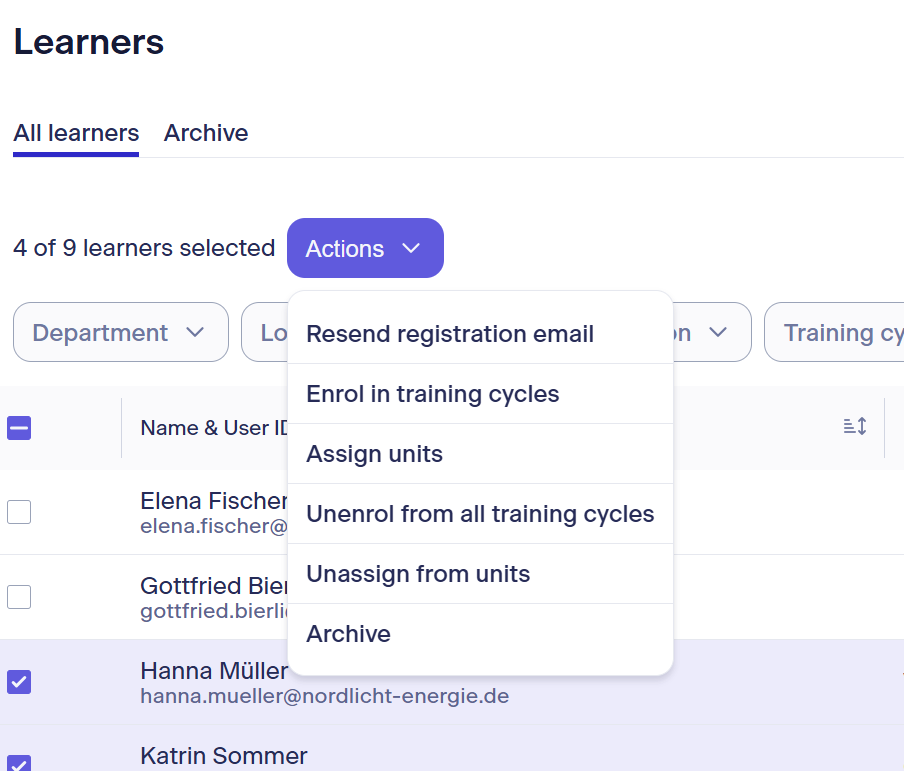
To archive the selected learners, select Archive from the Actions menu at the top.
Please note the additional information under Confirm Archive and check the learners to be archived in particular. Click the checkbox to activate the Archive button.
Note: "once a learner has been removed" refers here to permanently deleted learners - archived learners can be reactivated at any time!
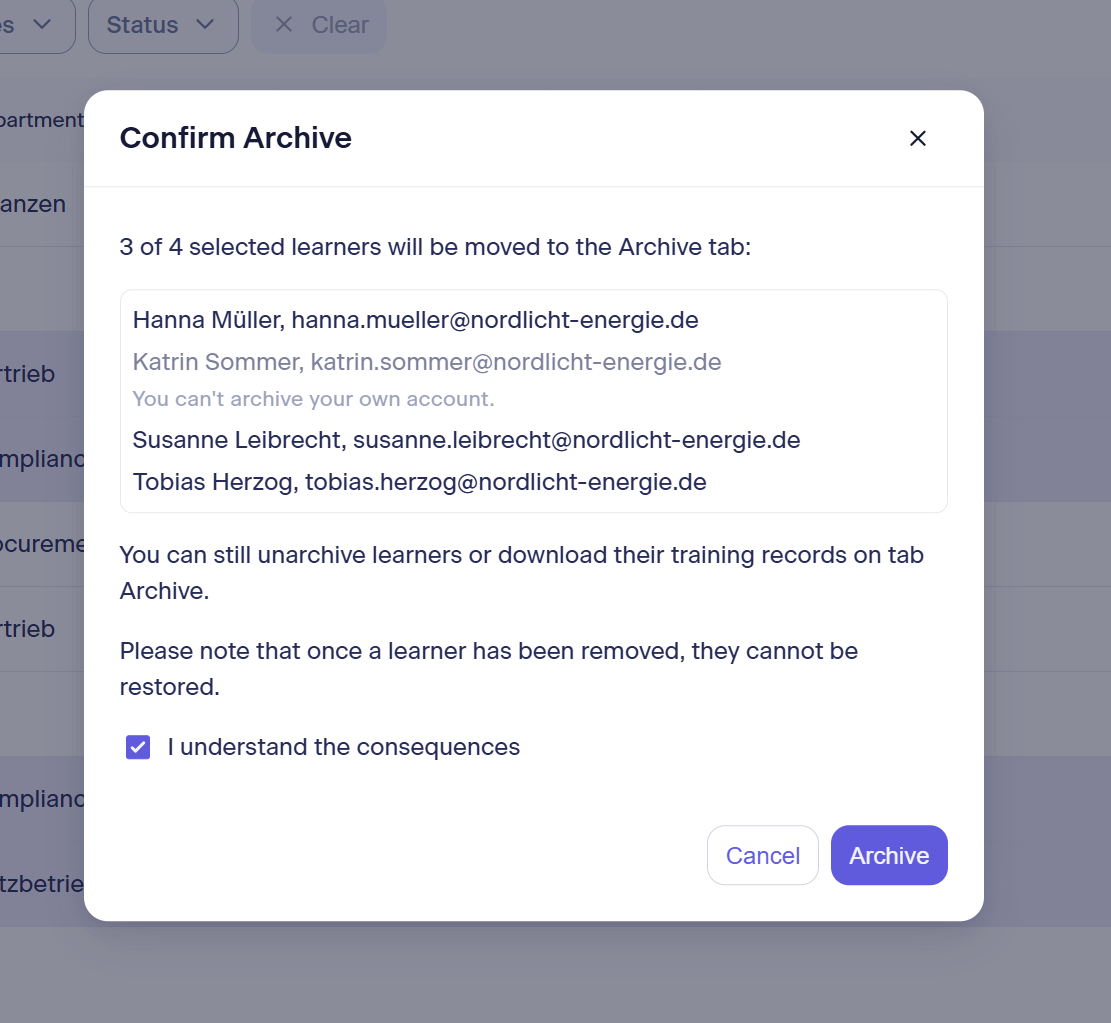
After the learners have been archived, they will be removed from the All learners list and you will find the learners under the Archived tab again.
Our best practice recommendation for archiving larger numbers of learners who cannot be found collectively via existing entries:
Pre-mark learners to be archived using CSV synchronization
Step 1
There are two options here:
1. Re-purposing an existing master data field: If your organization does not actively use all master data fields for learners, one of the previously empty fields (e.g. location or position) can be used to store a unique marker (e.g. Archiving) in your CSV file.
Enter this marker in the selected column for all persons to be archived and save your CSV file. Then upload it to LMS+ - the previously empty field will be filled with the marker.
2. If your organization uses all master data fields, you can create an additional unit. Units serve as an extended filter and can be created, adjusted, or deleted at any time as needed. You can find more information about this in the article How to setup and manage your business units in LMS+
Create a unit: In LMS+, go to the Units tab under Administration and create a new unit with a clear name (e.g. Departed or Archive). Units serve as an extended filter and can be created, adjusted, or deleted at any time as needed.
Adjust CSV file: Add a new column named units at the very end of your CSV file. (The column structure will then be: firstname, lastname, email, department, location, position, employeeID, units)
Enter data & upload: In the units column, enter the exact name of the previously created unit (e.g. Archive) for all learners to be archived. Then upload the file to LMS+. All persons with this entry will now automatically be assigned to the new unit. You can also see this in the learner overview in the Units column.
Once all learners to be archived are marked in the list of learners, proceed to
Step 2
Use filters and perform mass archiving
- Activate filter: Activate the filter function in the learner overview at the top right via the button.
Depending on Step 1, now:
- Select the used master data field: In the dropdown menu of this column, select your set marker (in the example "Archiving") by clicking on it.
or
- Select unit: In the Units dropdown menu, select your created unit (e.g. Archive). Exactly the marked persons will now be displayed to you.
Then:
- Select all persons: Check the box to select. For larger lists, make sure to click the blue text "Select all XX learners" so that really all matching results are selected.
- Archive: Click Actions at the top and select Archive from the menu.
All learners marked in this way will immediately be moved to the Archived tab.