How to set up SSO with Microsoft Entra ID
Please ask your IT Administrator (with SAML and IdP management permissions) to set up the configuration in the Microsoft Entra ID administration console.
Before we start, please make sure you have received the following information from your account manager:
- Redirect URL
- Service Provider Entity ID
Please provide the following to your lawpilots account manager to complete the SSO setup:
- The “Federation Metadata XML” file from the "SAML Certificates" section
Follow these steps to Create an Enterprise Application in Microsoft Entra ID
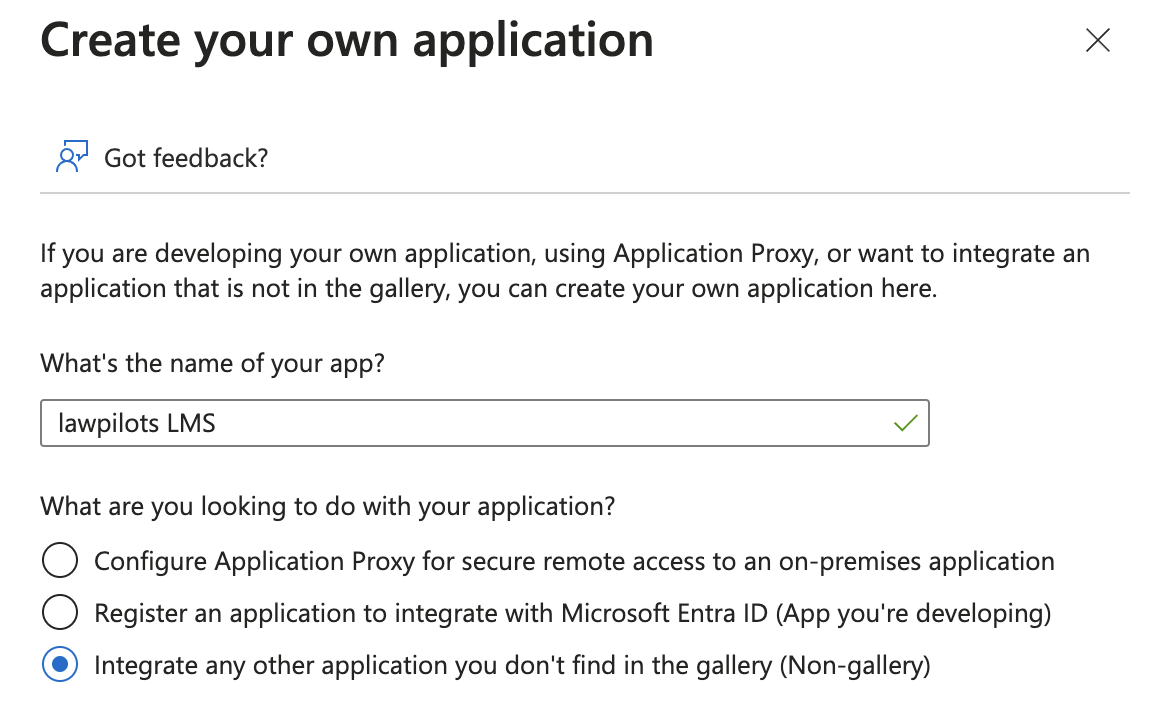
1. Start by logging into the Entra ID administration console at https://entra.microsoft.com/. Navigate to “Applications > Enterprise Applications” and select "+ New application. Now select “+Create your own application”. This action will open an overlay on the right side of your screen.
2. In the right-side overlay, type in a unique, identifiable name for your application. We recommend naming the new application “Lawpilots LMS+” for easy future identification. Select “Integrate any other application you don’t find in the gallery…”, and click “Create” to finish setting up the Enterprise Application.

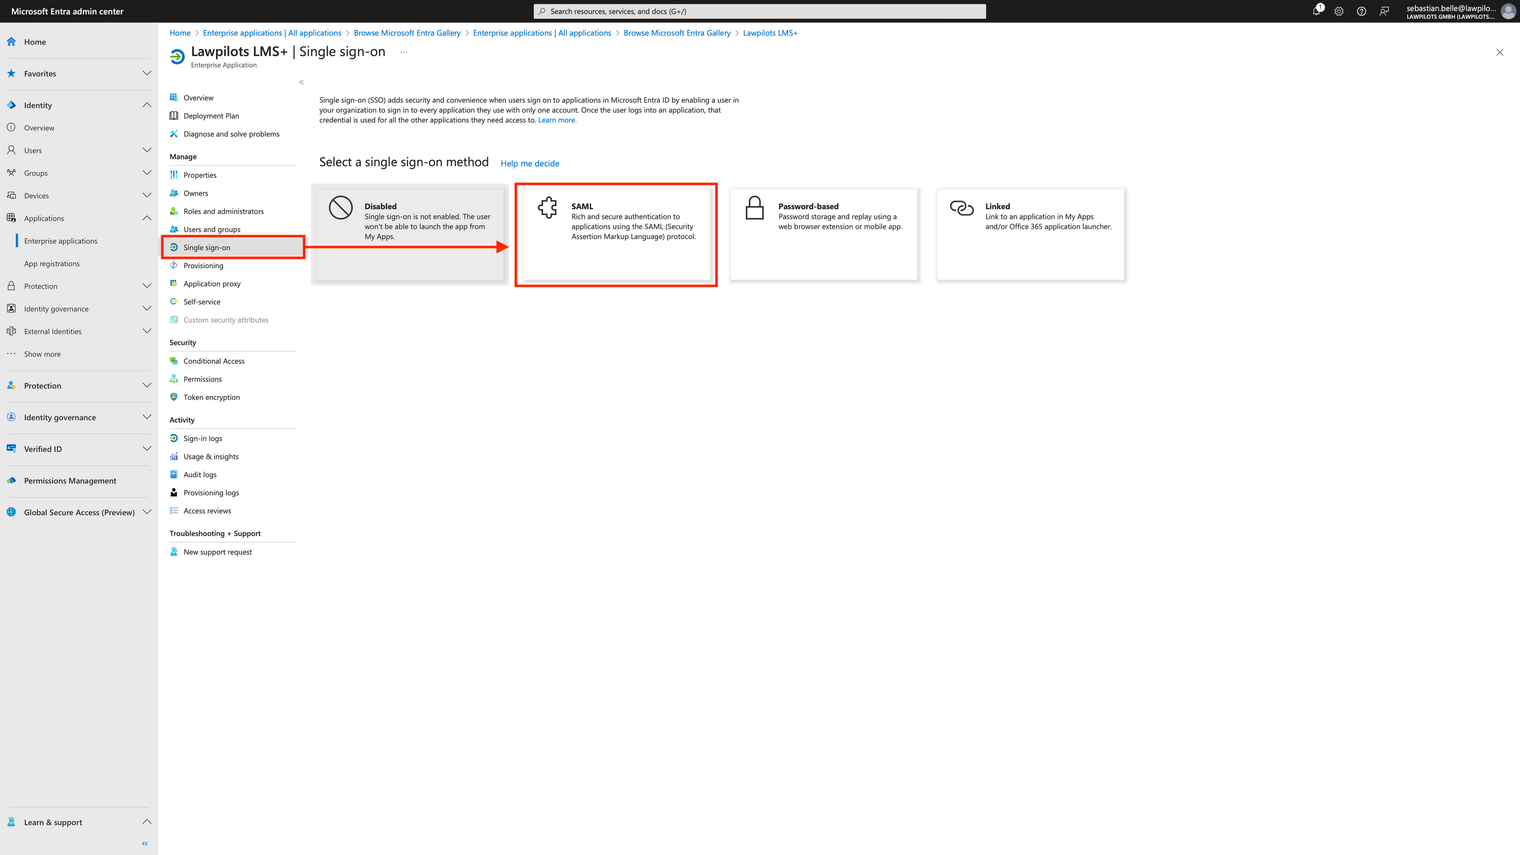
3. After creating the Enterprise Application, the system will automatically take you to its overview page. From here, go to the “Single sign-on” section in the side menu and select SAML as the login mechanism. This will bring you to the configuration screen for the SAML SSO setup.
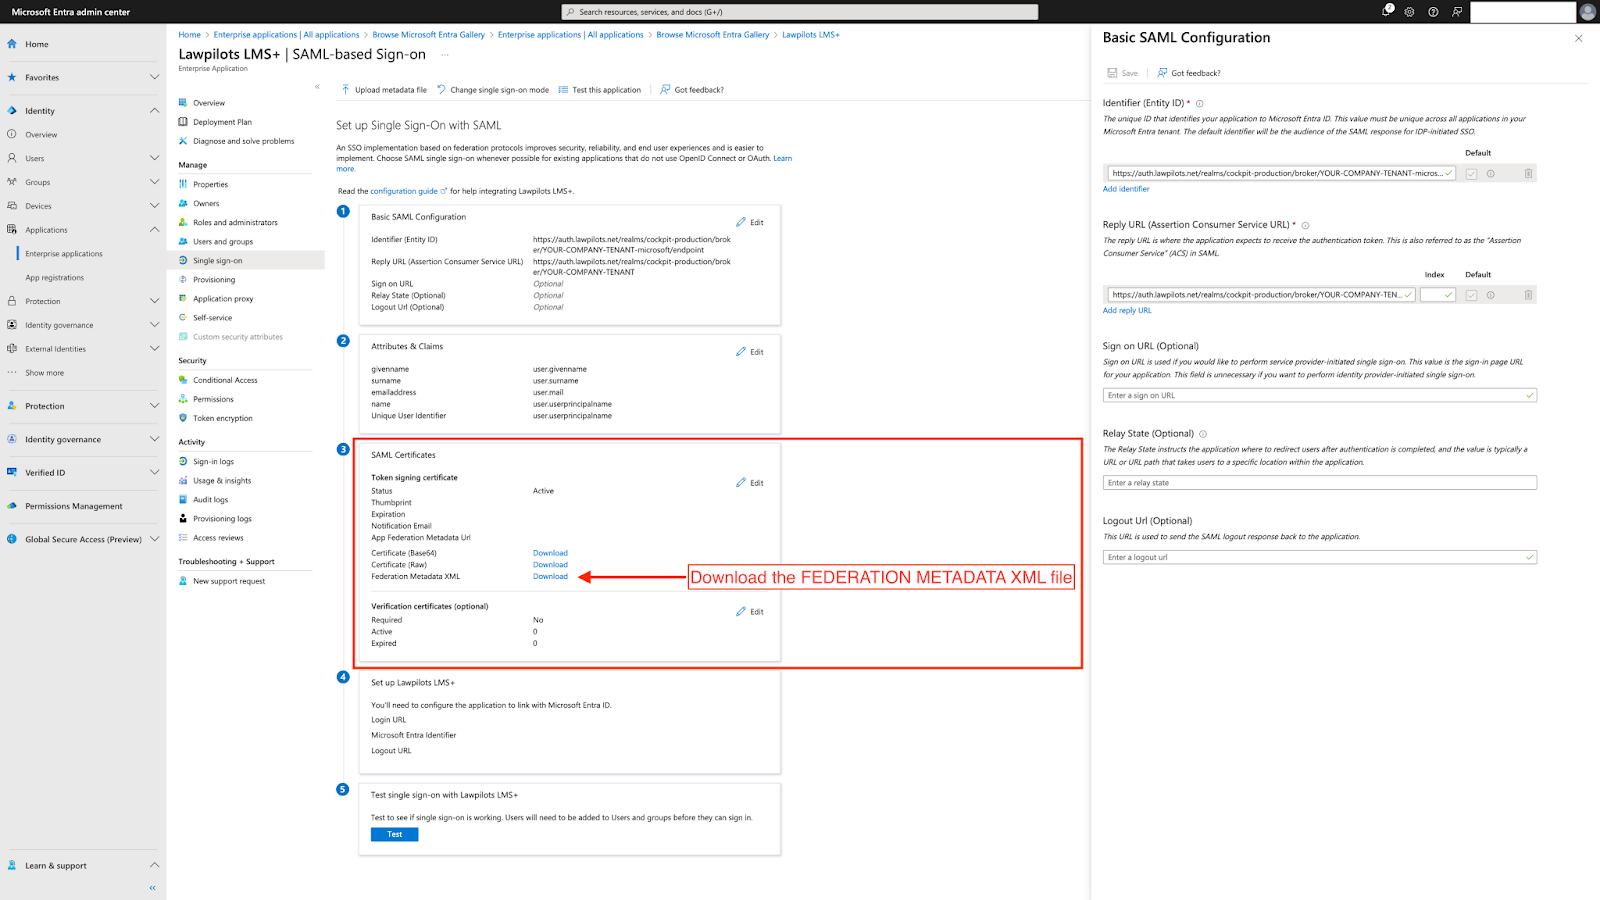
4. On the SAML setup page, click on “edit” in the "Basic SAML Configuration" section. This opens another overlay on the right side where you should enter the Identifier (Entity ID) and the Reply URL (Assertion Consumer Service URL) provided by lawpilots. Don’t forget to select “Save” after entering the information.

5. Download the “FEDERATION METADATA XML” file from the "SAML CERTIFICATES" section and send it to your lawpilots account manager. This file is necessary for lawpilots to finalize the SSO setup on our end.
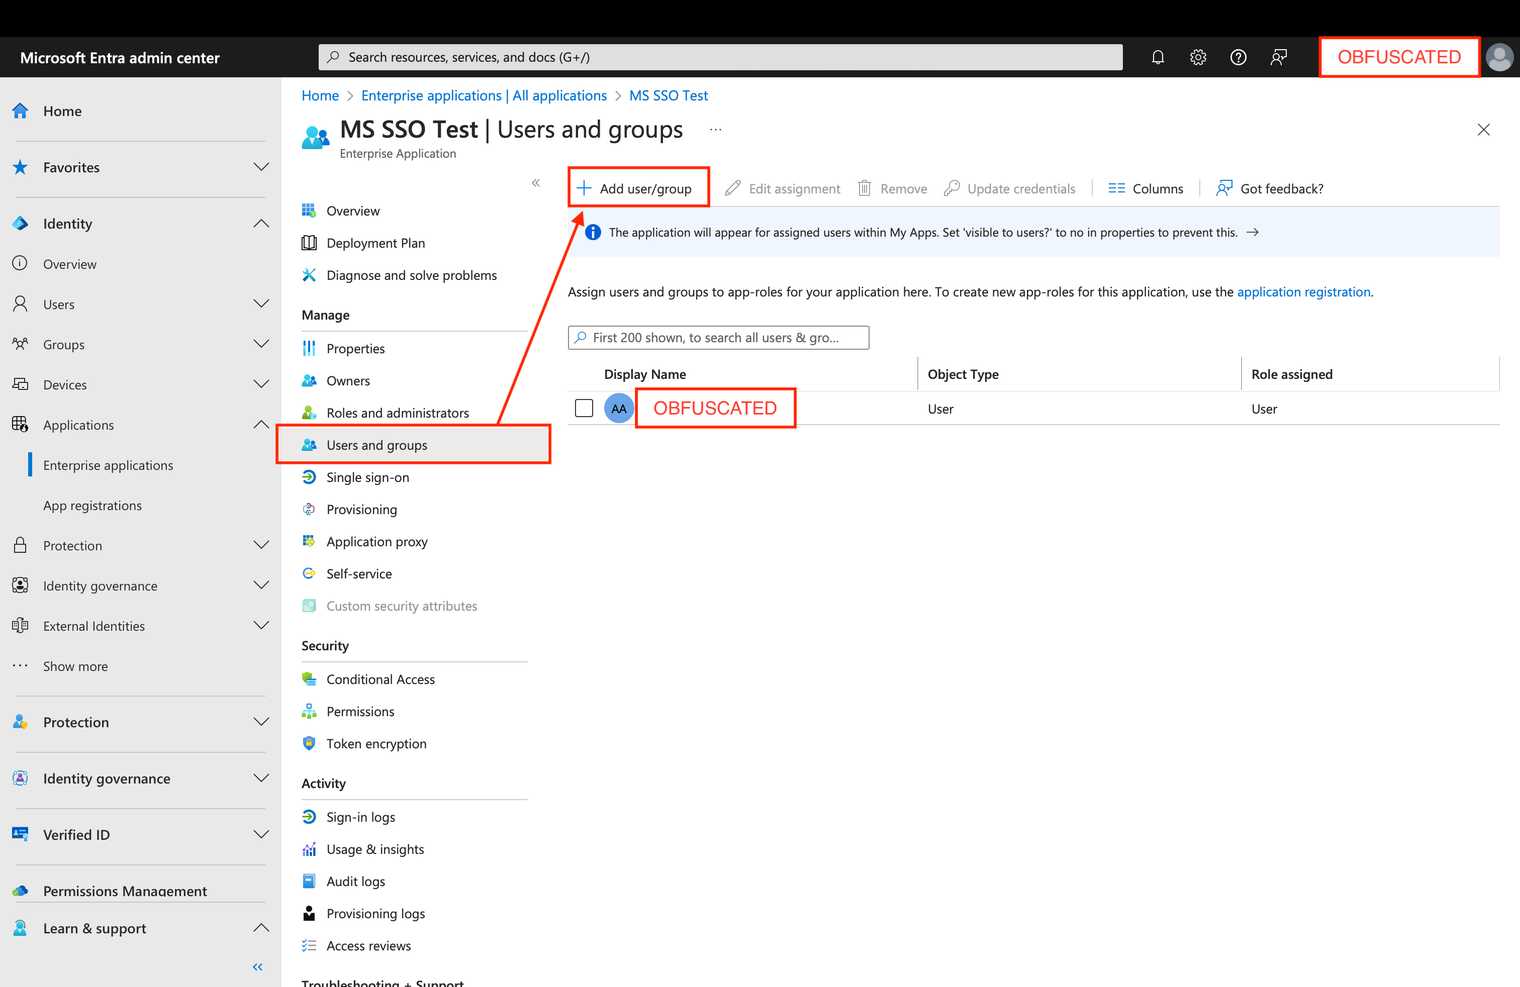
6. Finally, navigate to the “Users and groups” section and click on “add users/user groups”. Add the users or user groups who need access to LMS+ via Entra ID SSO. Important note: only those added to the application will have access!